
Choose your languages
You choose which languages your site is translated into. Each language gets its own address, such as yoursite.com/es/, so visitors and search engines find every page in their language. You can add or remove a language at any time.
Steps
-
In WordPress, go to WP Provider Translate → Settings.
-
Under Languages → Translate into, type the language you want in Add a language (its name, its own name or its code, such as Spanish, Español or es) and press Enter or click it. It appears in the list with the address where it will live (
/es/). The order of the list is the order in the language switcher.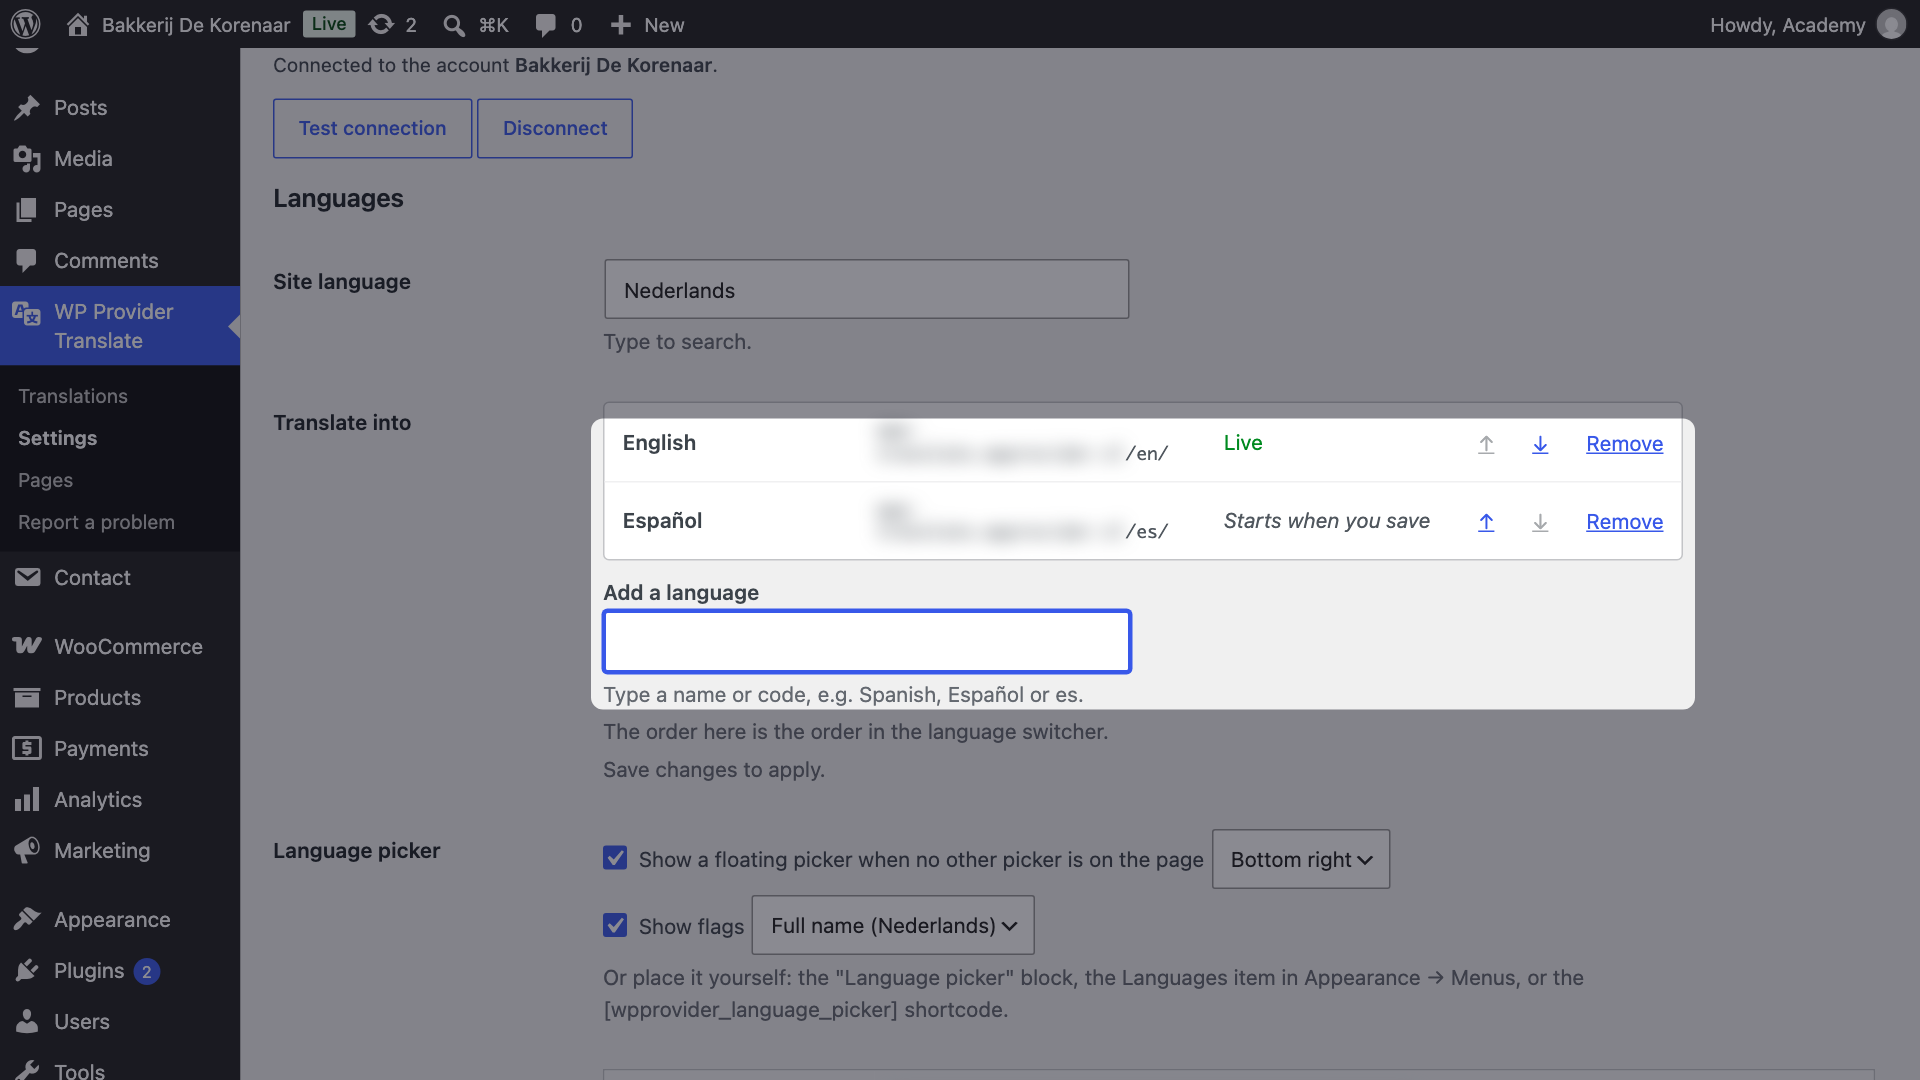
On a site without languages yet, the same field is the second step of the setup, under Which languages do you want?, with the button Save and start translating. See install and connect.
-
Click Save Changes. Translation starts in the background; you don’t have to wait on this screen.
-
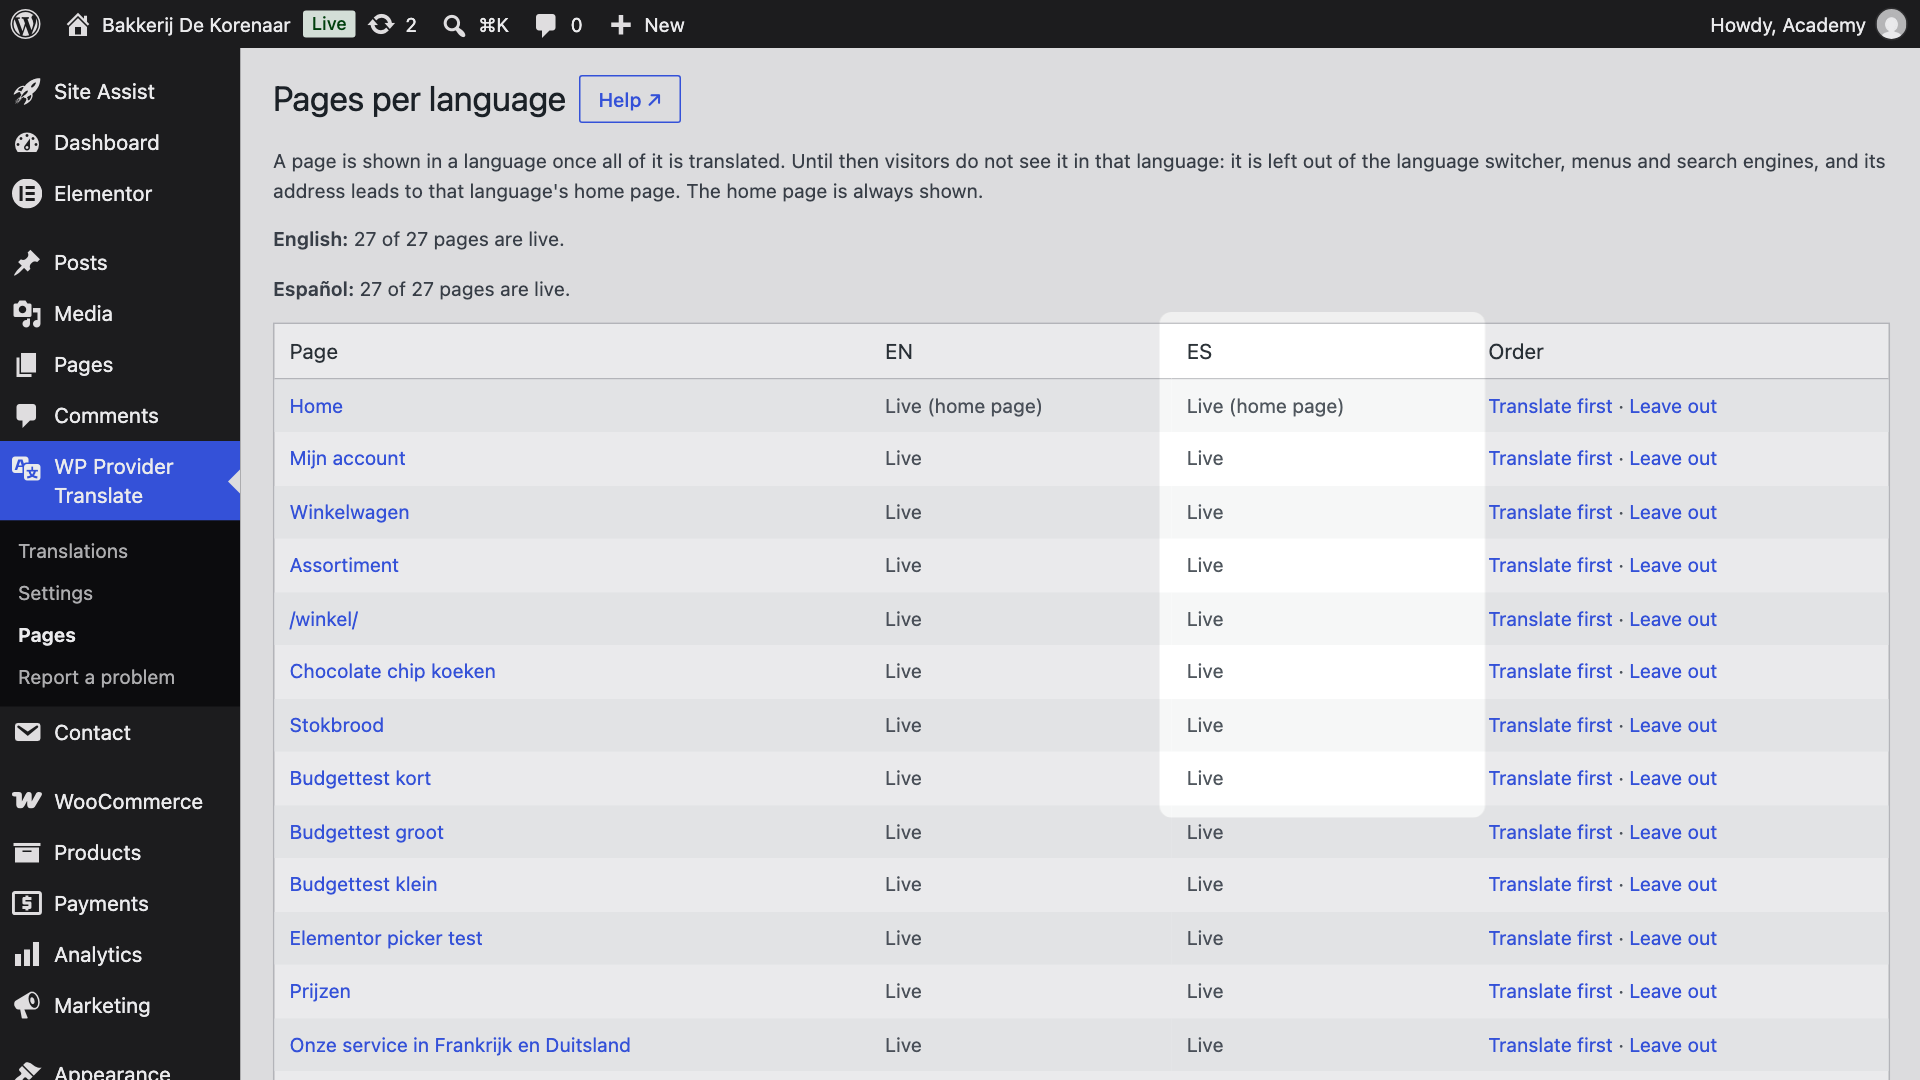
Go to WP Provider Translate → Pages to follow the progress. The new language has its own column; each page goes from Not seen yet to Being translated to Live.
Good to know
- Whole pages only. A page appears in a language once all of its text is translated. Until then it is left out of the language switcher, menus and search engines in that language, and visitors see it in your site’s own language.
- WordPress’s own texts (buttons, dates, messages from your theme and plugins) switch too: the matching WordPress language packs are installed automatically.
- Your plan sets how many languages are translated automatically; next to the list you read Your plan includes … languages. You can add more than that. A language marked Not in your plan is shown to visitors like the others, with its own address and its place in the language switcher, but it is not translated automatically: you translate it yourself under WP Provider Translate → Translations, or upgrade. What your plan means for your site, such as how much room is left, is in the strip at the top of every WP Provider Translate screen: see change your plan.
- Removing a language hides it from visitors. Its translations are kept, so adding it again later costs nothing.
Troubleshooting
- A page stays on “Being translated”. Large pages take a few minutes. If a page shows Does not fit in your plan, it needs more room than your plan has left; see WP Provider Translate → Pages for what it needs.
- The language is not in the list. WP Provider Translate supports 37 languages. Use WP Provider Translate → Report a problem in WordPress if you need another one.
For developers
wp wpprovider-translate statusshows the languages and the translation queue.wp wpprovider-translate packsinstalls the WordPress language packs for the chosen languages right away.